 |
Home > Photo
> Classroom > Silkypix 3+ Development
RAW
conversions using Silkypix
version 3 and greater
Development Settings
| Make sure to reserve each image for development using the
F8 key so a yellow checkmark is
visible. In the 'Batch development for selected (one image only)
or reserved (many) scene' dialog box make sure to specify either TIFF or
JPG as the file type to be saved. Default settings are good to
start. Next click on the 'Setting...' button to open the Setting
for developed image box and make sure the correct setting are in
place. With versions 3 & 4 you will not be able to make
adjustments until development is completed. Silkypix Pro and 5
allow development and editing to happen simultaneously. |
|
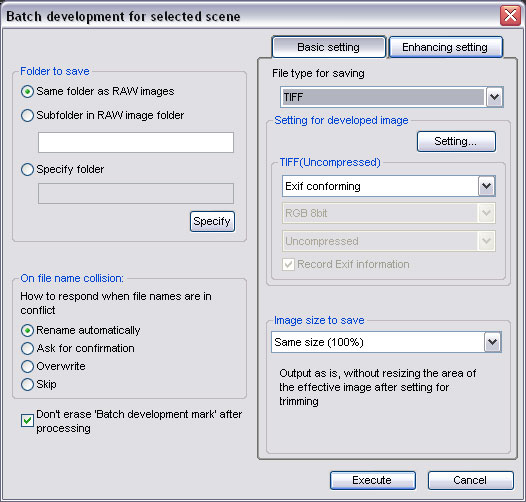
TIFF file type selected, Setting... button brings up
dialog box below:
|
|

Check folder locations and Output colorspace
|
|